Documentation Index
Fetch the complete documentation index at: https://octomind.dev/docs/llms.txt
Use this file to discover all available pages before exploring further.
CI/CD pipeline integration
In order to integrate Octomind into your CI/CD pipeline, you will need a Azure DevOps Task and a Azure Pipeline Extension.
1. Setup CI Task
Include the followingAzure DevOps Task into your CI/CD build pipeline on pull
request. See azure task docs for more details.
Show how to create an API key
Show how to create an API key
The option to create your API key can be found within the settings menu.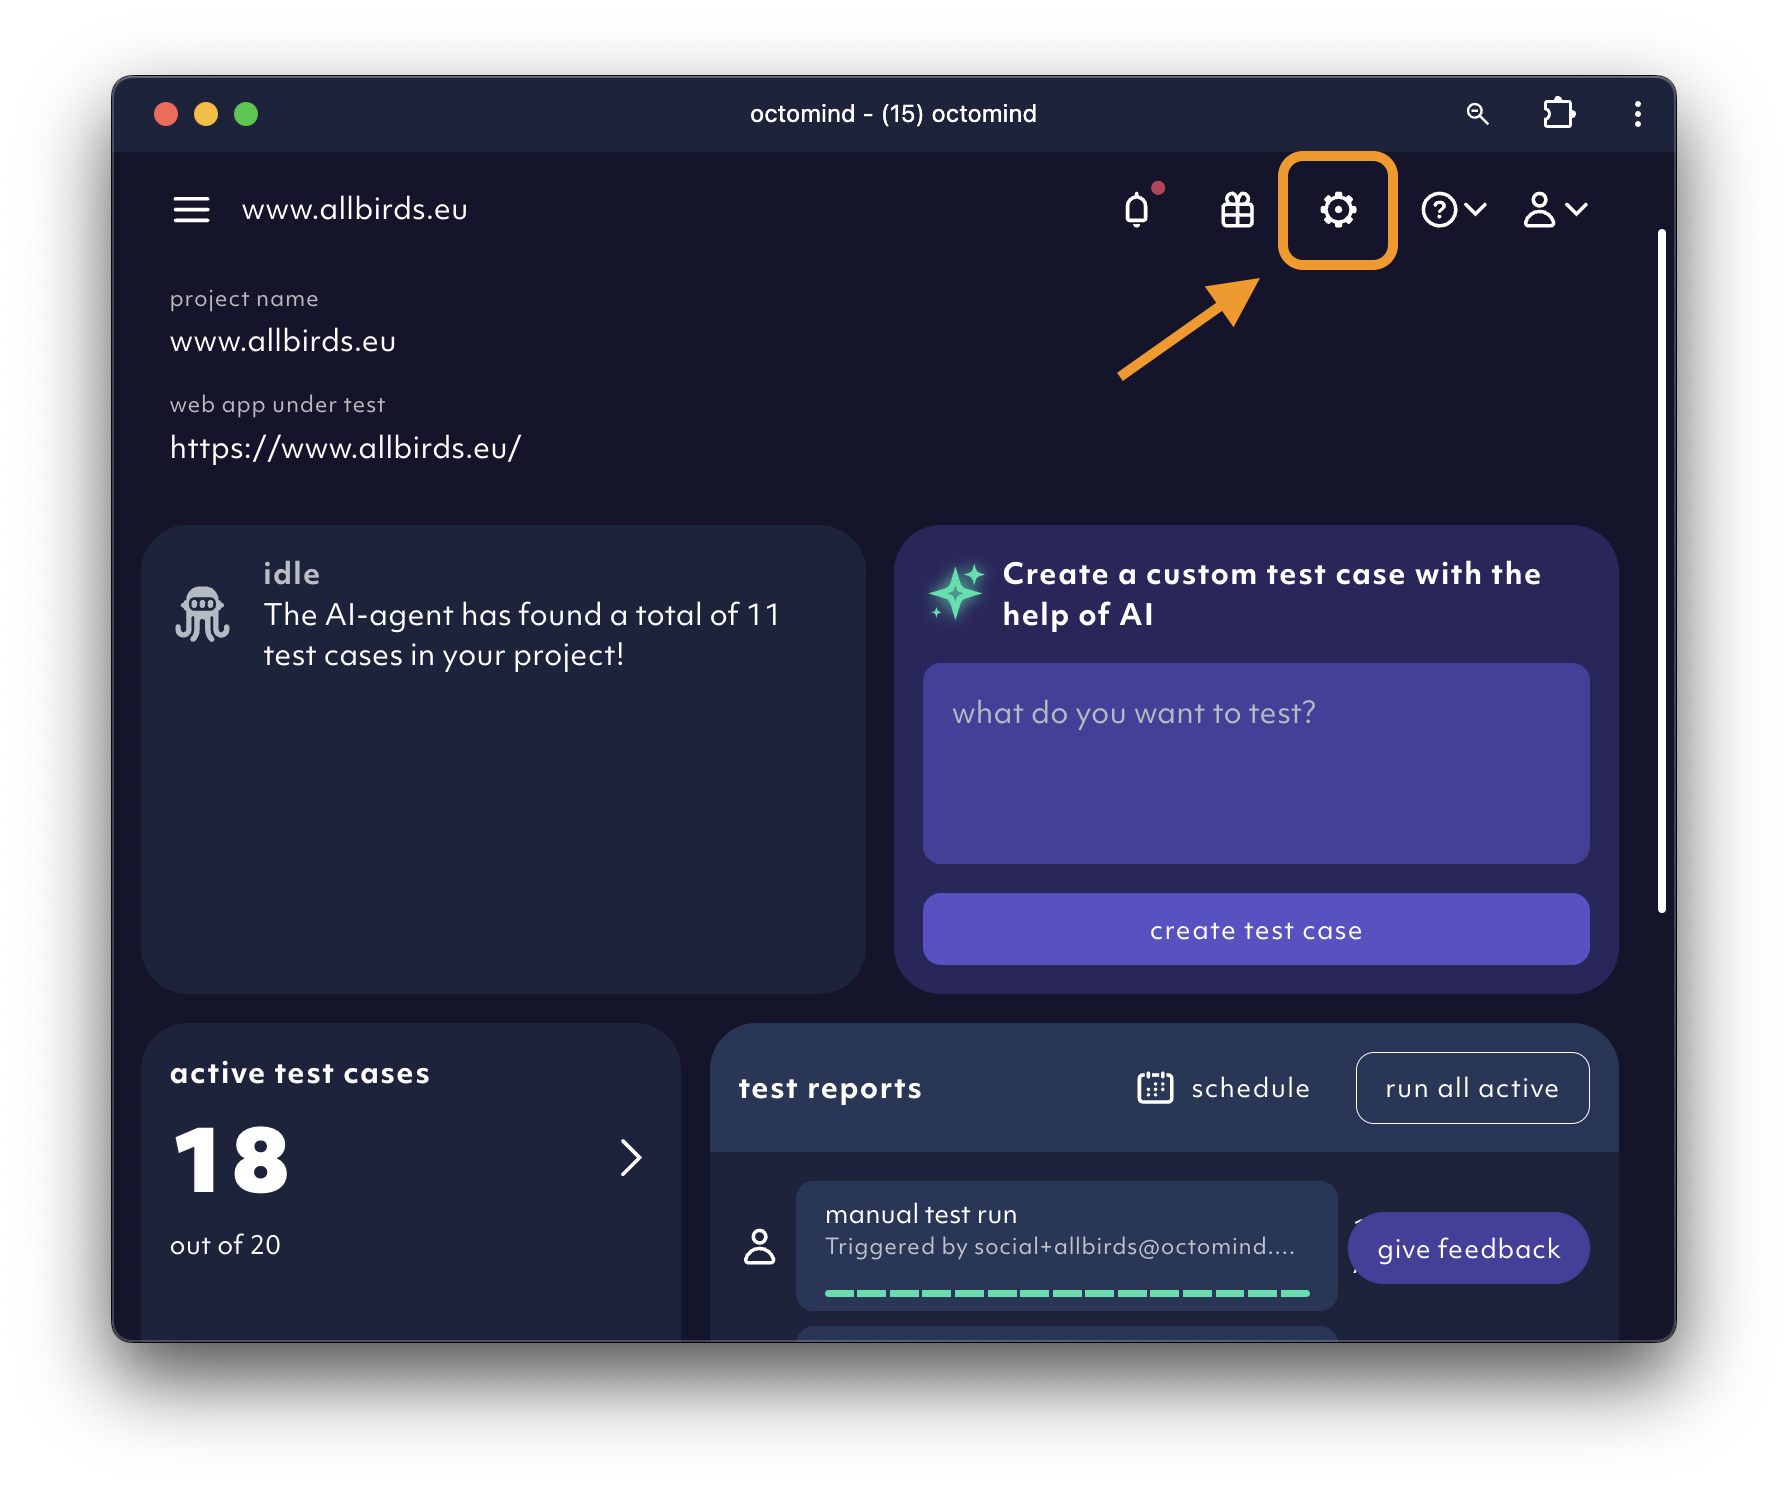 Click on
 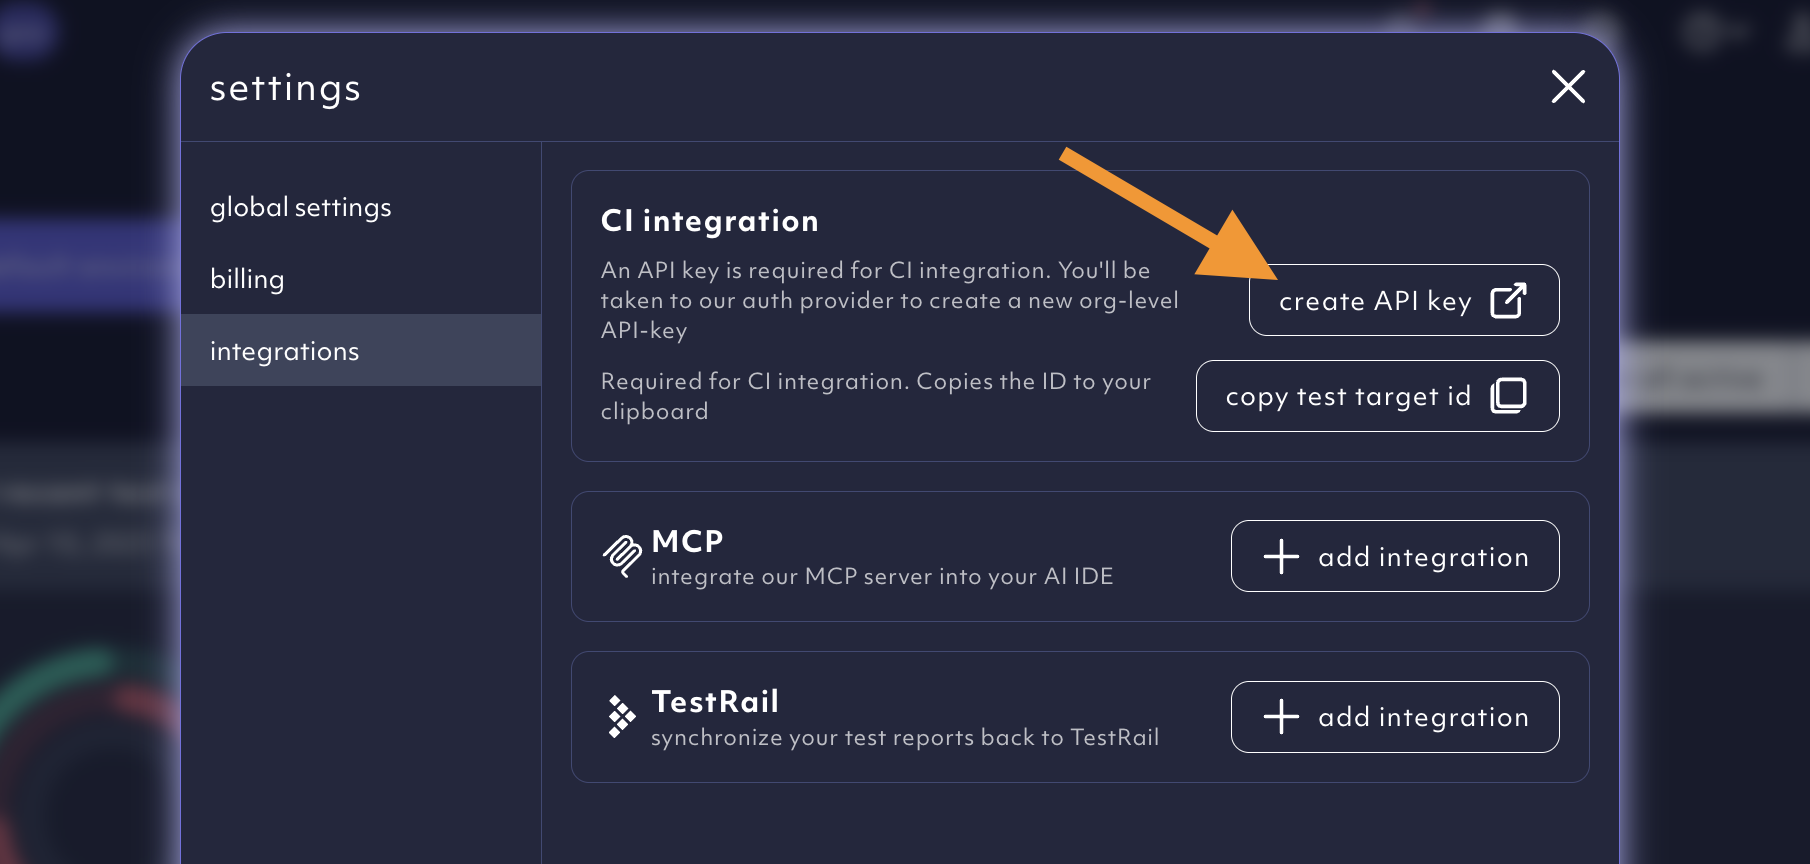 You then will be navigated to our auth provider where you can create a new organization-level API key.Add the API key to your CI provider as a secret to run test reports from the CI.
Create an API key.Show how to get your test target id
Show how to get your test target id
The option to copy your test target ID can be found within the settings menu.Click on the 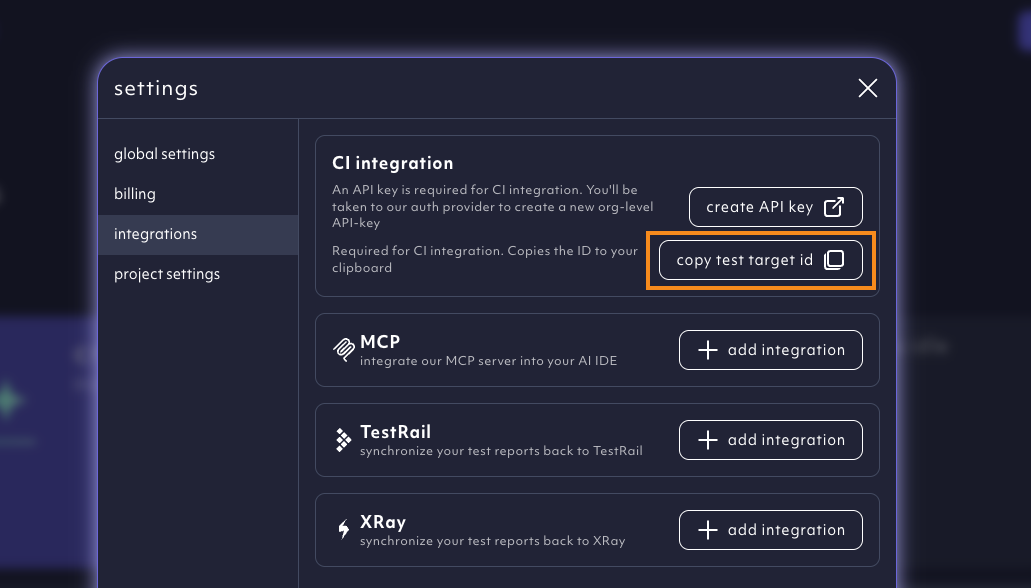
copy test target id.2. Install Azure DevOps pipeline extension
We need read and write access to pull requests ONLY so we are allowed to
comment back with test results. We won’t be able to see your code.

3. Set user permissions
Make sure that yourbuild service user also has permissions to comment to pull requests. To do so, navigate to the
Project Settings > Repos > Repositories > Security tab and allow the ‘contribute to pull request’ flag.

4. See it in action
Octomind automatically runs tests on your pull request, and comments with a summary in your PR.